


DIY Draught Seal Kit for One Double Hung Sash Window (30mm Stop Bead)
Australia’s #1 Draught Sealing System for Sash Windows
Reduce rattles, draughts, and outside noise while improving the thermal efficiency of your timber double-hung sash windows, all without costly window replacement. Proudly Australian manufactured, with pickup available in Sydney.
🪟 Why Choose This Kit Over Others?
This isn’t just another DIY draught sealing kit, it’s been designed specifically for timber sash windows and built to last. Here’s what makes it superior:
✅ Australian Made & Owned – Support local manufacturing and get reliable quality with fast Sydney pickup options.
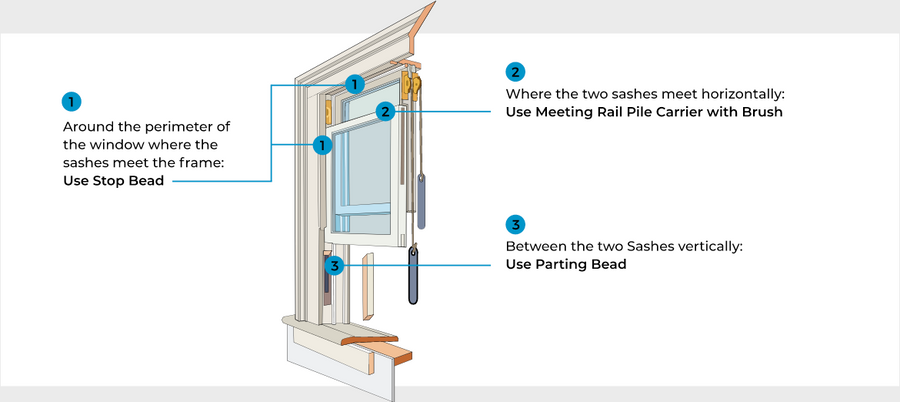
✅ Brush Seal System – Uses high-performance brush seals, not compression seals (which should never be used on sliding windows). The brush system allows smooth sash movement while maintaining an airtight seal.
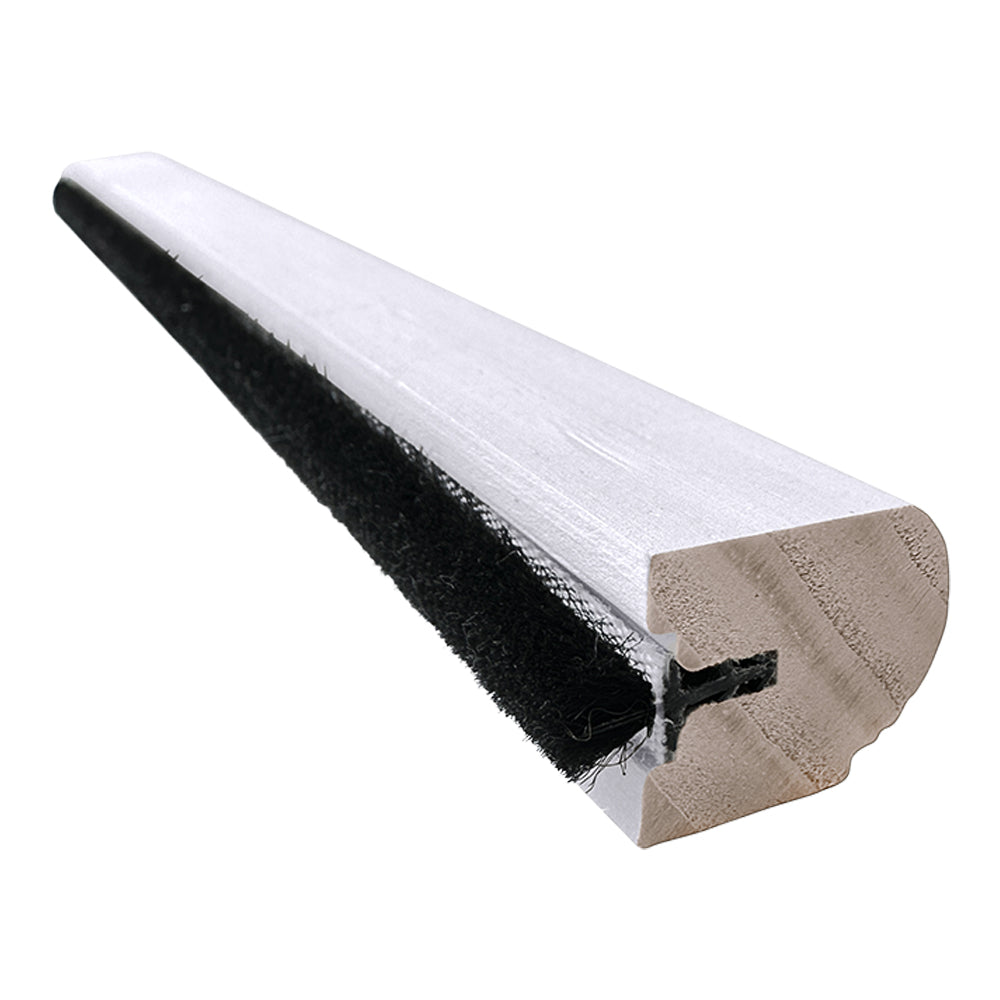
✅ Plastic Fin for Complete Seal – The plastic fin inside the brush is the key to creating a perfect barrier. It’s this fin that forms the true weather seal. This fin needs to be in contact with the timber when installed.
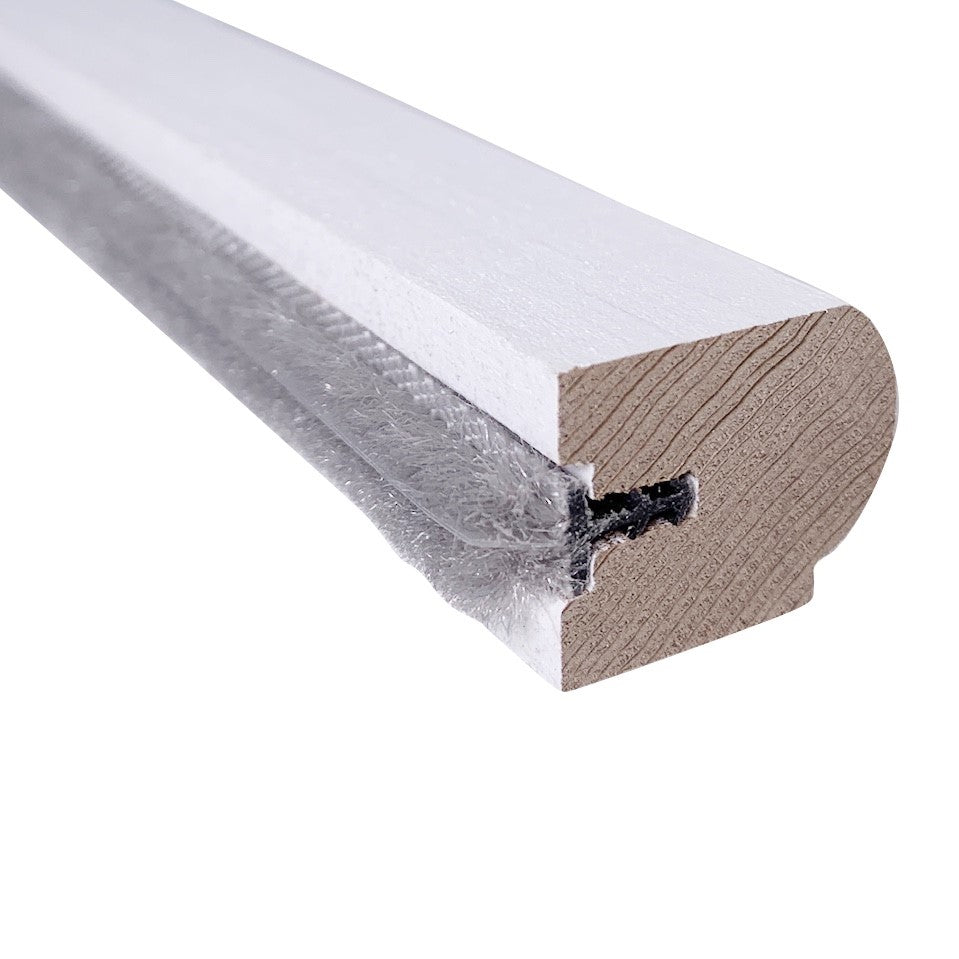
✅ Kerf-Fit Brush – The brush strips are installed into the stop beads via a kerf slot, creating a snug, professional fit superior to surface-mounted options.
✅ Ready-to-Install – Supplied pre-assembled with brush and fin already inserted into the timber beading. Simply cut to size and install, no need to assemble the bead with carriers and brush.
✅ DIY Friendly – Each kit contains everything needed to seal one double-hung sash window up to 2m high x 1m wide. Perfect for homeowners, builders, and restorers alike.
What’s in the Kit
-
2 x 2m FSC-Certified Timber Staff Beads (30 x 18mm)
-
2 x 1m FSC-Certified Timber Staff Beads (30 x 18mm)
-
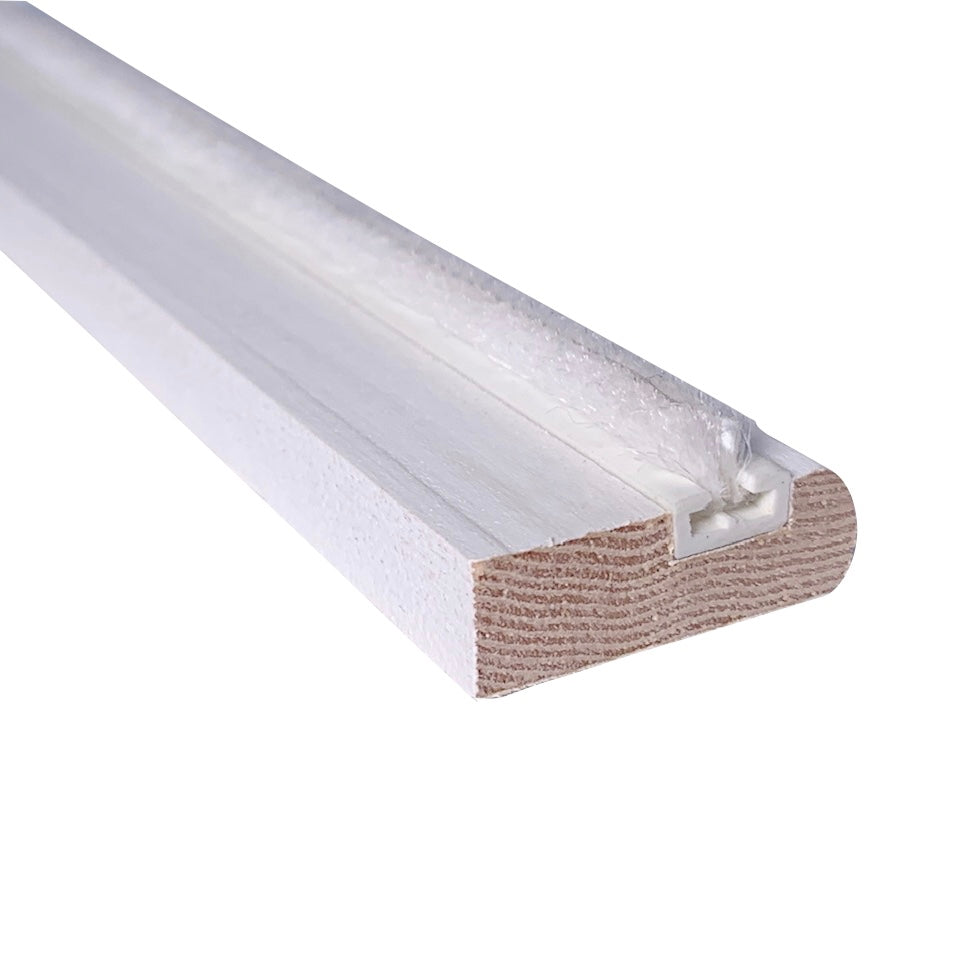
2 x 2m FSC-Certified Timber Parting Beads (25 x 8mm)
-
1 x 1m FSC-Certified Timber Parting Bead (25 x 8mm)
-
1 x 1m Meeting Rail Draught Stopper
-
1 x 11m Hank of Donaghys 8mm Sash Cord (for use with our pulleys)
🪚 All timber components are lightly primed with undercoat and will require final finishing after installation.
Optional Hardware Kit
Complete your restoration with:
-
2 x Sash Lifts
-
1 x Fitch Fastener
Includes step-by-step instructions, after-sales support, and an installation video to guide you through every step.
You might need...


- Phone support | 0425 229 090
TIP: We always recommend having all materials onsite PRIOR to commencing any restoration project as sometimes delays occur in the courier network which are outside of the control of Lock and Latch.
Installation:
🚚 Shipping & Delivery Information
Please note: We are unable to guarantee any delivery times. If you are in urgent need of your items, please contact us on 0425 229 090. We may be able to arrange an express delivery service, if available.
Local Pick-Up Option: We have a warehouse in Warriewood, Sydney where local pick-up is available. This is by pre-arrangement only. Please contact us to organise a suitable time before visiting.
Important: We always recommend having all materials onsite prior to commencing any restoration project, as delays in the courier network can occur and are outside the control of Lock and Latch.
🌍 International Orders
For international shipping quotes, please contact us on +61 425 229 090.
📦 Estimated Delivery Times
NSW, QLD, VIC
Metro areas: 2–5 business days
Regional & Country areas: 3–14 business days
Western Australia
Perth & Metro areas: Up to 10 business days
Regional areas: 3–14 business days
Public holidays, especially around Christmas, tend to cause delays due to increased volume and reduced working hours. Many courier services experience slower processing times, and there's often a backlog of parcels. Please allow for delays during this time.